AOSP源码定制-so注入并集成hook框架
介绍
最近研究so的hook相关,看到了一些文章,尝试配合修改系统源码进行so注入hook,配合sandhook框架对测试app进行hook。
下面还是用AOSP8来演示。
简单测试
这里我通过修改源码去注入so,so注入的时机我开始的选择是越早越好。
这里选在在handleBindApplication处,创建ContextImpl对象时进行一系列的复制注入操作。
我们流程选择先将需要注入的so放到sd卡目录下,然后判断app为非系统app时进行复制到app目录,注入app等一系列操作。
我们找到源码,目录AOSP/frameworks/base/core/java/android/app/ActivityThread.java,找到handleBindApplication,定位到”final ContextImpl appContext = ContextImpl.createAppContext(this, data.info);”这一行。
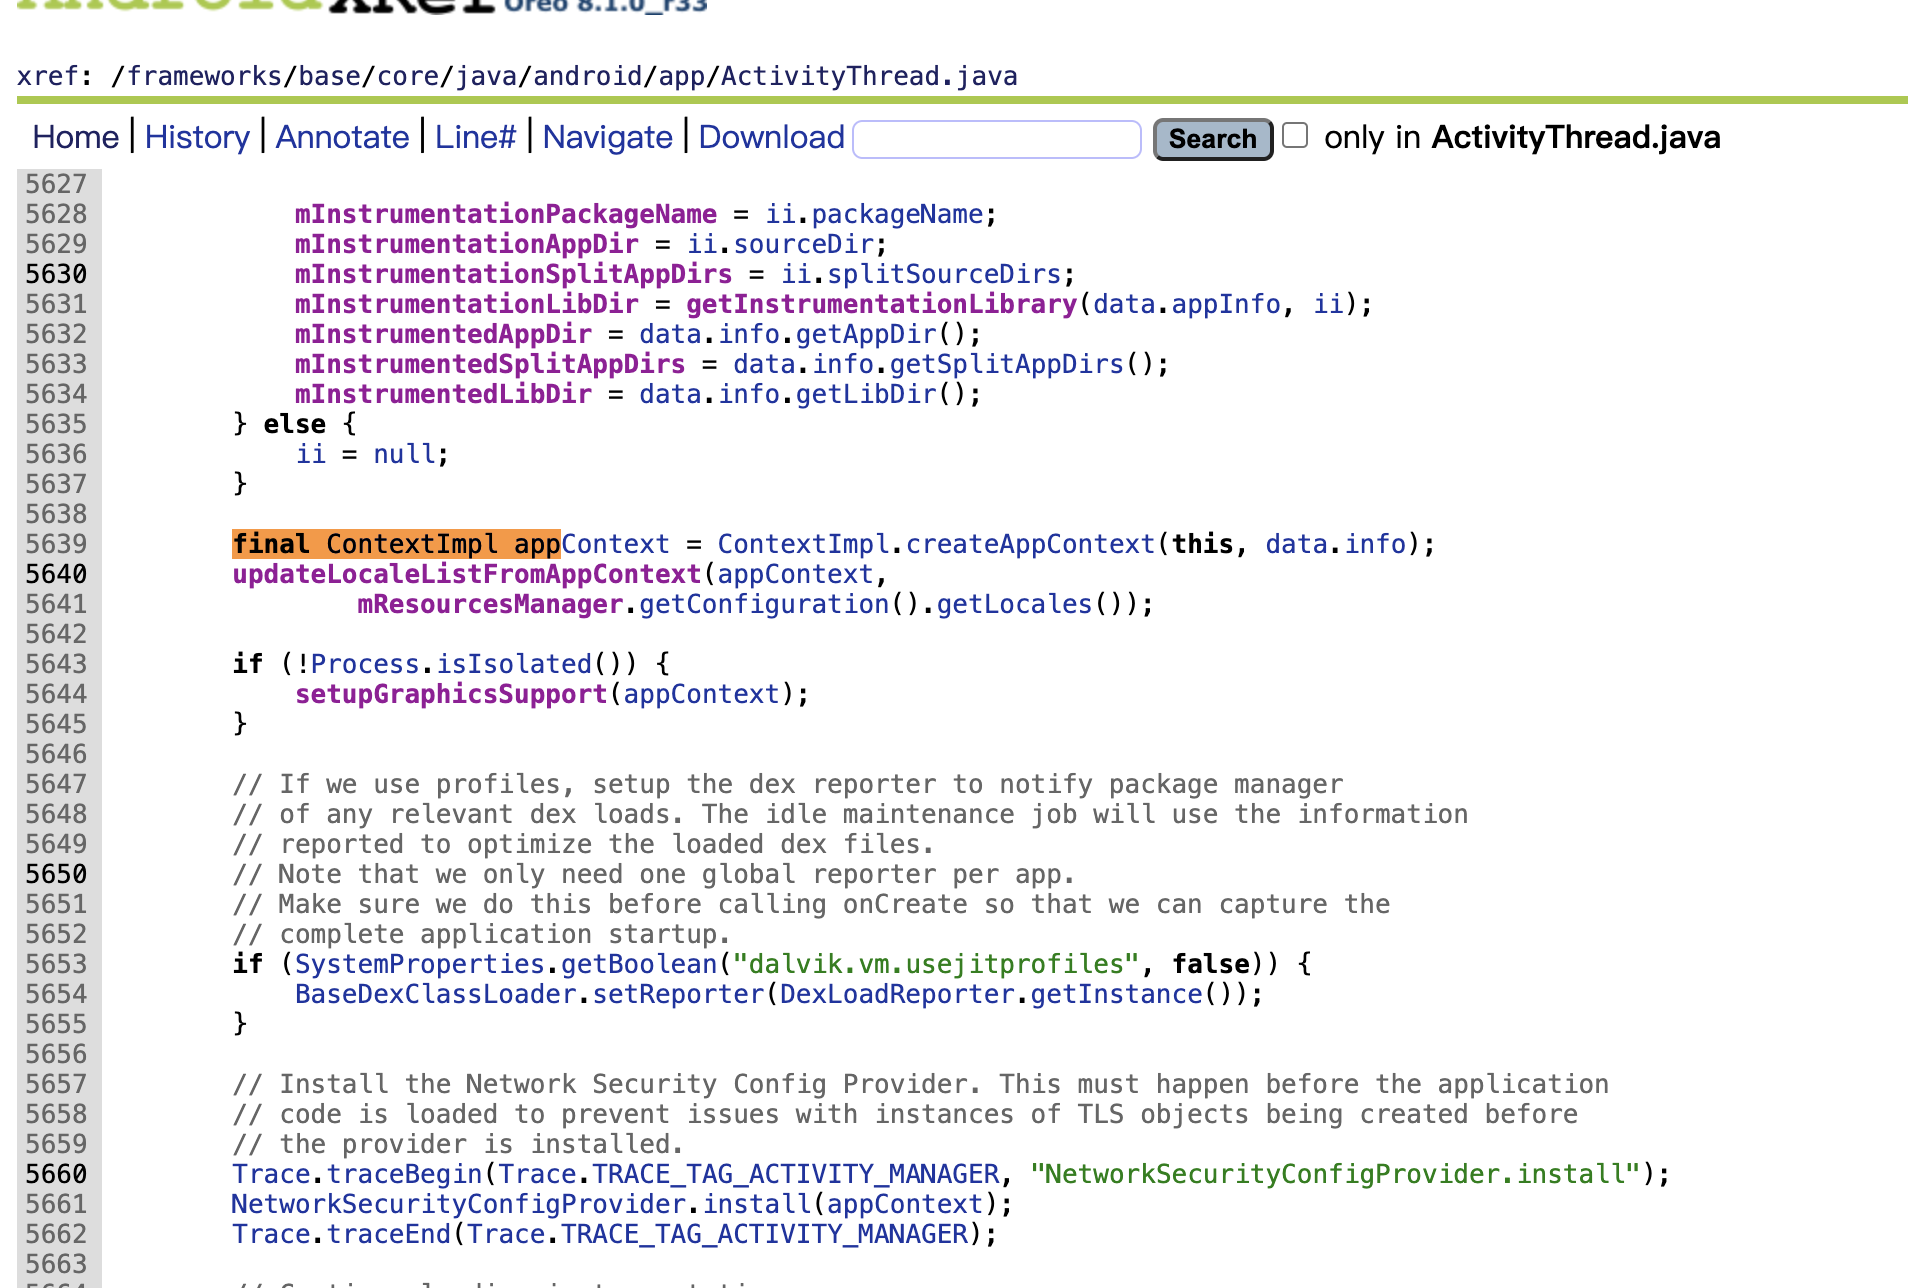
开始加入我们自己的代码:
        final ContextImpl appContext = ContextImpl.createAppContext(this, data.info);

        //add
        String soPath = "/sdcard/f0.so";
        File sofile = new File(soPath);
        if (sofile.exists()){
            Log.e("fukuyama", "satrt inject init copy");
            ContextImpl context = appContext;
            ActivityManager mAm = (ActivityManager)context.getSystemService("activity");
            String activity_packageName = mAm.getRunningTasks(1).get(0).topActivity.getPackageName();
            if(activity_packageName.indexOf("com.android")<0){
                String targetPath = "/data/data/" + activity_packageName + "/f0.so";
                String targetPath2 = "/data/data/" + activity_packageName + "/f032.so";
                File file1 = new File(targetPath);
                File file2 = new File(targetPath2);
                Persist.mycopy("/sdcard/f0.so", targetPath);
                Persist.mycopy("/sdcard/f032.so", targetPath2);
//                Log.e("fukuyama", activity_packageName);
                Log.e("fukuyama", "copy successful");

                int perm = FileUtils.S_IRWXU | FileUtils.S_IRWXG | FileUtils.S_IXOTH;
                FileUtils.setPermissions(targetPath, perm, -1, -1);
                FileUtils.setPermissions(targetPath2, perm, -1, -1);
                FileUtils.setPermissions(settingpath, perm, -1, -1);

                if(file1.exists()){
                    Log.e("fukuyama", System.getProperty("os.arch"));
                    if(System.getProperty("os.arch").indexOf("64")>=0){
                        System.load(targetPath);
                        Log.e("fukuyama", "successful64");
                        file1.delete();
                    }else{
                        System.load(targetPath2);
                        Log.e("fukuyama", "successful32");
                        file2.delete();
                    }
                }
            }
        }else {
            Log.e("fukuyama", "not found so!");
        }

        //add
mcpoy的代码如下,封装进自己注册的工具类:
 public static void mycopy(String srcFileName, String destFileName){
        InputStream in = null;
        OutputStream out = null;
        try{
            in = new FileInputStream(srcFileName);
            out = new FileOutputStream(destFileName);
            byte[] bytes = new byte[1024];

            int i = 0;
            while((i = in.read(bytes))!=-1){
                out.write(bytes,0,i);
            }
        } catch (Exception e) {
            e.printStackTrace();
        }finally {
            try{
                if(in != null){
                    in.close();
                }
                if(out != null){
                    out.flush();
                    out.close();
                }
            }catch (Exception e) {
                e.printStackTrace();
            }
        }
    }
编译系统并刷机。
编译so
另一边我们开始编译要注入的so,这里我选择用sandhook框架hook libc中的open函数,并打印path。
导入sandhook框架(地址:https://github.com/asLody/SandHook ):
将项目下SandHook/nativehook/src/main/cpp/中的文件全部导入
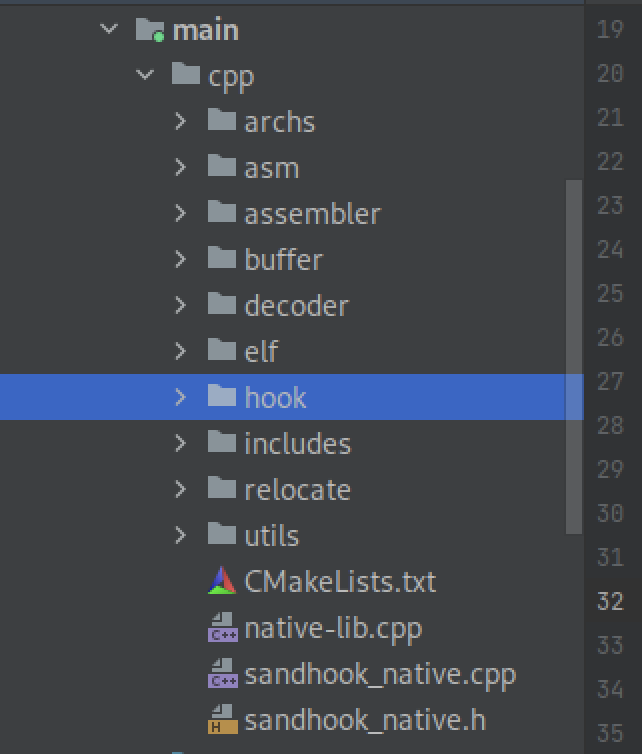
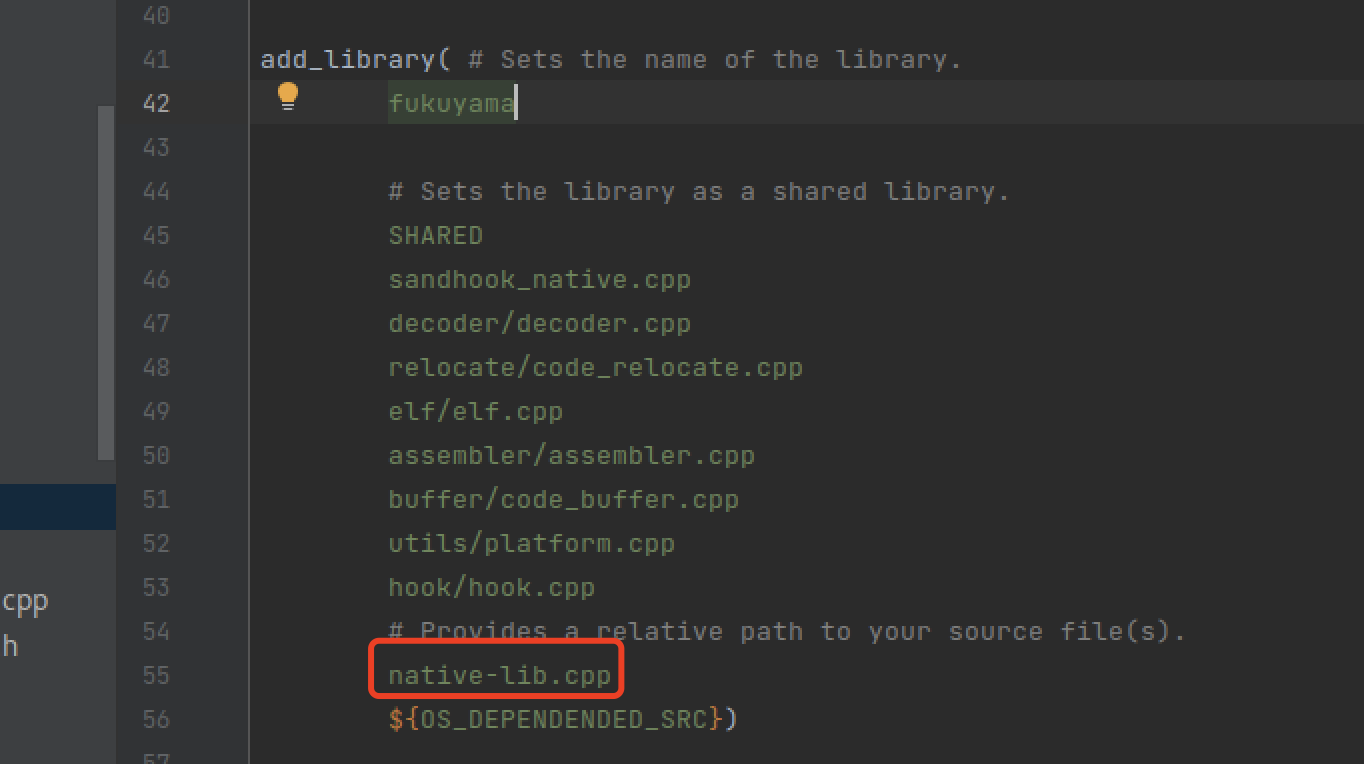
在CMakeList文件中加上我们自己的c文件。
开始编写hook代码,这里选择执行时机在JNI_Onload中:
#include <jni.h>
#include <string>
#include <android/log.h>
#include <unistd.h>
#include "sandhook_native.h"

int (*old_open)(const char *, int, ...) = nullptr;
int new_open(const char *arg0, int arg1, ...) {
   va_list args;
   va_start(args, arg1);
   int mode = va_arg(args, int);
   va_end(args);
   __android_log_print(4, "fukuyama", "open path -> %s", arg0);
   return old_open(arg0, arg1, mode);
}


void startHookJni(){
    char* target_lib = "libc.so";
    int size = 1000;
    char* lib_path = static_cast<char *>(malloc(size));
    getSoPath(lib_path, target_lib, size);
    __android_log_print(4, "fukuyama", "target so path:%s", lib_path);
    if(!lib_path){
        return;
    }
    old_open = reinterpret_cast<int (*)(const char *, int, ...)>(SandInlineHookSym(lib_path,
                                                  "open",
                                                  reinterpret_cast<void *>(new_open)));
    __android_log_print(4, "fukuyama", "hook startHookJni end!");
}


extern "C" void _init(void){
    __android_log_print(4, "fukuyama", "called init");
}

extern "C" int JNICALL JNI_OnLoad(JavaVM* vm, void *resuerved){
    __android_log_print(4, "fukuyama", "called JNI_OnLoad");
    startHookJni();
    return JNI_VERSION_1_6;
}
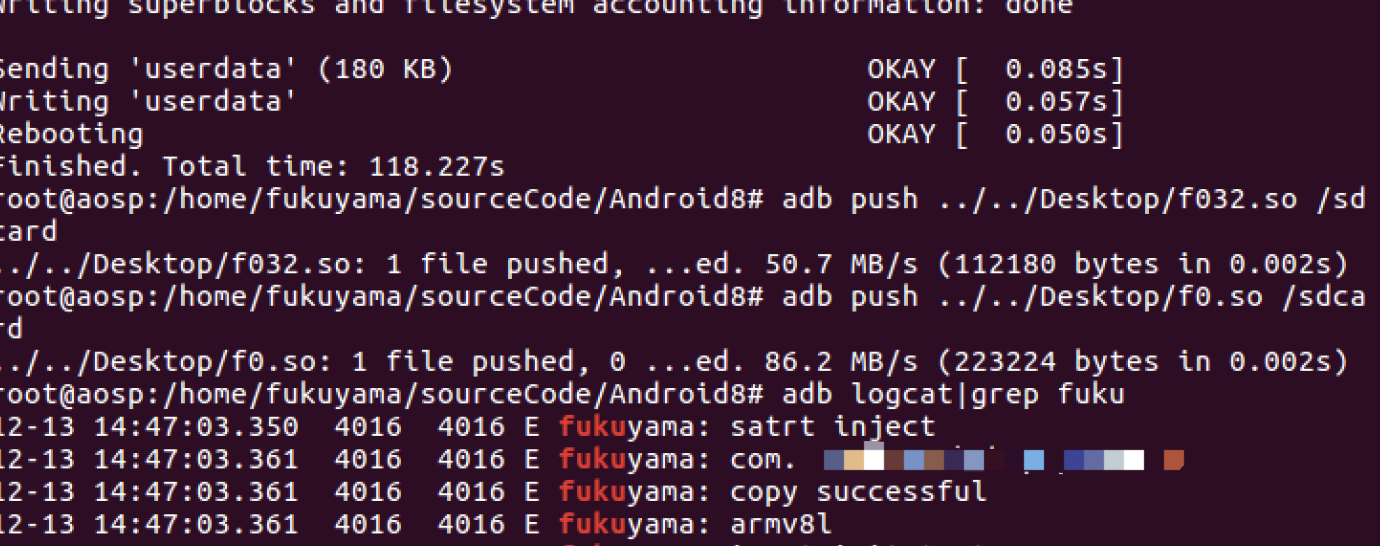
编译后,解压将lib中的两个so推到手机sd卡目录,命名为上面源码中的f0.s0,f032.so。
记得开启测试app的读写sd卡权限。
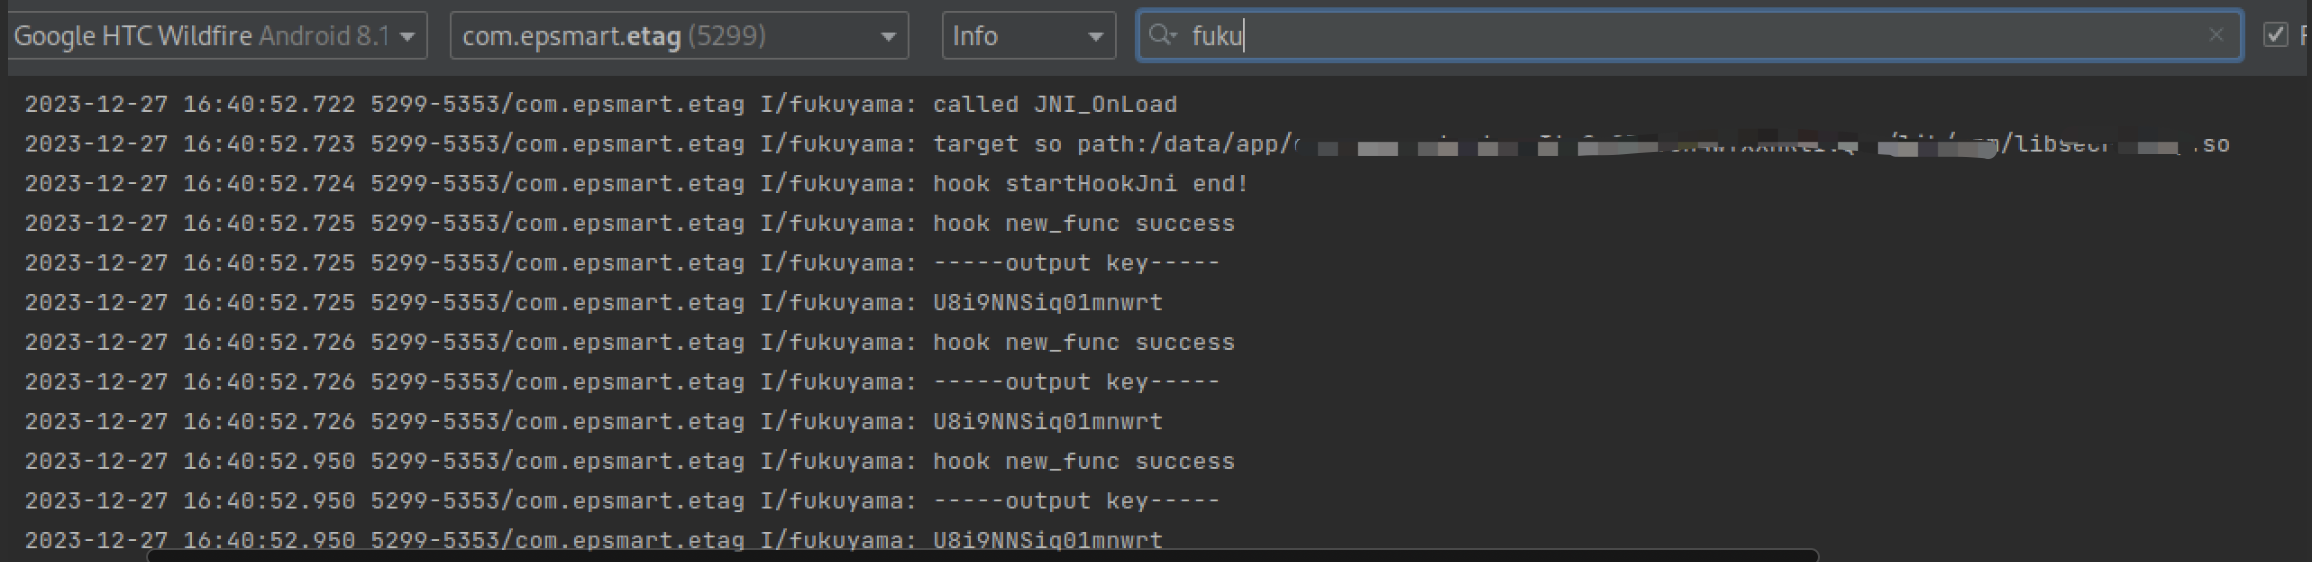
查看hook结果
运行app,查看logcat输出日志,首先是会有提示复制成功,架构类型等字样。
进入hook后,打印出open的参数。

hook app载入的so
前面完成了对libc的hook,这里开始对app中载入的so中的函数进行hook。
因为我这里选择的载入的so时机比较早,实际中,无法hook到app后载入的so,这里我一开始选择增加一个配置文件,文件内容包含要hook的目标so,手动在handleBindApplication中读写配置文件并载入目标so,结果发现对so载入流程理解太浅,这里so会载入两次,导致我手动载入的so是没有被调用的,自然也就无法hook。
后面采用本方法,我修改/libcore/ojluni/src/main/java/java/lang/System.java中的loadLibrary方法,增加一个判断,判断libname是否为目标so的名称,在app本身完成so载入后,我再载入自己的so。
这里要修改前面的源码,将文件删除以及载入so的代码去除,在System.java中去载入自己的so。
if(file1.exists()){
	Log.e("fukuyama", System.getProperty("os.arch"));
		if(System.getProperty("os.arch").indexOf("64")>=0){
			// System.load(targetPath);
				Log.e("fukuyama", "successful64");
                // file1.delete();
                    }else{
                // System.load(targetPath2);
                Log.e("fukuyama", "successful32");
                // file2.delete();
                    }
                }
修改System.java:
    @CallerSensitive
    public static void loadLibrary(String libname) {
        Runtime.getRuntime().loadLibrary0(VMStack.getCallingClassLoader(), libname);
        //add
        if(libname == "soname"){  //要hook的so名称
            if(System.getProperty("os.arch").indexOf("64")>=0){
                System.load("/data/data/app_packagename/f0.so");  //对应app目录下的自己的so文件
            }else{
                System.load("/data/data/app_packagename/f032.so");
            }
        }
        //add
    }
再修改下注入的so的代码,hook一个获取密钥的函数,让他在logcat中吐出来:
#include <jni.h>
#include <string>
#include <android/log.h>
#include <string>
#include <unistd.h>
#include <pthread.h>
#include <thread>
#include "sandhook_native.h"


jstring (*old_func)(JNIEnv* env, jobject instance);

void getSoPath(char *result, char* target_lib, int size){
    FILE* f = fopen("/proc/self/maps", "r");
    char so_path[size];
    if (f){
        while(EOF != fscanf(f, "%s", so_path)){
            if(strstr(so_path, target_lib)){
                strncpy(result, so_path, size);
                break;
            }
        }
    }
}

jstring new_func(JNIEnv* env, jobject instance){
    __android_log_print(4, "fukuyama", "hook new_func success");
    jstring res = old_func(env, instance);
    const char *nativeString = env->GetStringUTFChars(res, 0);
    __android_log_print(4, "fukuyama", "-----output key-----");
    __android_log_print(4, "fukuyama", "%s", nativeString);
    return res;
}


void startHookJni(){
    char* target_lib = "libxxxxxxxx.so";
    int size = 1000;
    char* lib_path = static_cast<char *>(malloc(size));
    getSoPath(lib_path, target_lib, size);
    __android_log_print(4, "fukuyama", "target so path:%s", lib_path);
    if(!lib_path){
        return;
    }
    old_func = reinterpret_cast<jstring (*)(JNIEnv *, jobject)>(reinterpret_cast<jstring *(*)(
            JNIEnv *, jobject)>(SandInlineHookSym(lib_path,
                                                  "Java_xxxxxxxxxxxxx_getSecretKey_stringFromJNI",
                                                  reinterpret_cast<void *>(new_func))));
    __android_log_print(4, "fukuyama", "hook startHookJni end!");
}


extern "C" void _init(void){
    __android_log_print(4, "fukuyama", "called init");
}

extern "C" int JNICALL JNI_OnLoad(JavaVM* vm, void *resuerved){
    __android_log_print(4, "fukuyama", "called JNI_OnLoad");
    startHookJni();
    return JNI_VERSION_1_6;
}
重复上面的操作,编译刷机,推送so再运行app。
可以发现已经成功hook并吐出了我们需要的key。
优化
到这里基本实现了hook相关的操作。
但这里还不完善,hook一个so就要修改源码,还是要封装一个函数,在System.loadLibrary进行按照配置文件进行注入操作。
这里向我注册的一个白名单类中添加一个方法,用于注入so,在system.java中存在无法导入某些类,这里用反射解决。
注册类中相关方法:
 public static String getPackageName() {
        String PackageName = null;
        try {
            final Method declaredMethod = Class.forName("android.app.ActivityThread", false, Persist.class.getClassLoader())
                    .getDeclaredMethod("currentPackageName", (Class<?>[]) new Class[0]);
            declaredMethod.setAccessible(true);
            final Object invoke = declaredMethod.invoke(null, new Object[0]);
            if (invoke instanceof String) {
                PackageName = (String) invoke;
            }
        } catch (Throwable e) {
        }
        return PackageName;
    }


    public static void injectso(String libname){
        String activity_packageName = getPackageName();
        String targetPath = "/data/data/" + activity_packageName + "/f0.so";
        String targetPath2 = "/data/data/" + activity_packageName + "/f032.so";
        String settingpath = "/data/data/" + activity_packageName + "/config.txt";
        File file1 = new File(targetPath);
        File file2 = new File(targetPath2);
        File settingfile = new File(settingpath);
        if(file1.exists()){
            Log.e("fukuyama", System.getProperty("os.arch"));
            if(System.getProperty("os.arch").indexOf("64")>=0){
                if(settingfile.exists()){
                    Log.e("fukuyama", settingpath);
                    try {
                        FileReader fileReader = new FileReader(settingpath);
                        BufferedReader bufferedReader = new BufferedReader(fileReader);
                        String line;
                        while ((line = bufferedReader.readLine()) != null) {
                            if(libname.equals(line)){
                                Log.e("fukuyama", "successful64");
                                System.load(targetPath);
                                file1.delete();
                            }else{
                                Log.e("fukuyama", "not equal");
                            }
                        }
                        bufferedReader.close();
                    } catch (IOException e) {
                        e.printStackTrace();
                    }
                }else{
                    Log.e("fukuyama", "not found "+settingpath);
                }
            }else{
                if(settingfile.exists()){
                    Log.e("fukuyama", settingpath);
                    try {
                        FileReader fileReader = new FileReader(settingpath);
                        BufferedReader bufferedReader = new BufferedReader(fileReader);
                        String line;
                        while ((line = bufferedReader.readLine()) != null) {
                            if(libname.equals(line)){
                                Log.e("fukuyama", "successful32");
                                System.load(targetPath2);
                                file2.delete();
                            }else{
                                Log.e("fukuyama", "not equal");
                            }
                        }
                        bufferedReader.close();
                    } catch (IOException e) {
                        e.printStackTrace();
                    }
                }else{
                    Log.e("fukuyama", "not found "+settingpath);
                }
            }
        }

    }
在System.java中反射调用,记得导入reflect相关的库。
 @CallerSensitive
    public static void loadLibrary(String libname) {
        Runtime.getRuntime().loadLibrary0(VMStack.getCallingClassLoader(), libname);

        try {
            final Method declaredMethod = Class.forName("com.fukuyama.Persist")
                    .getDeclaredMethod("injectso",String.class);
            declaredMethod.setAccessible(true);
            final Object invoke = declaredMethod.invoke(null, libname);
        } catch (Throwable e) {
        }

    }
再编译刷机测试:
推入so到sd卡目录,这里增加了一个配置文件,内容就是需要hook的so名称,比如hook libnative-lib.so,就在sd卡目录下的config.txt中写入native-lib。
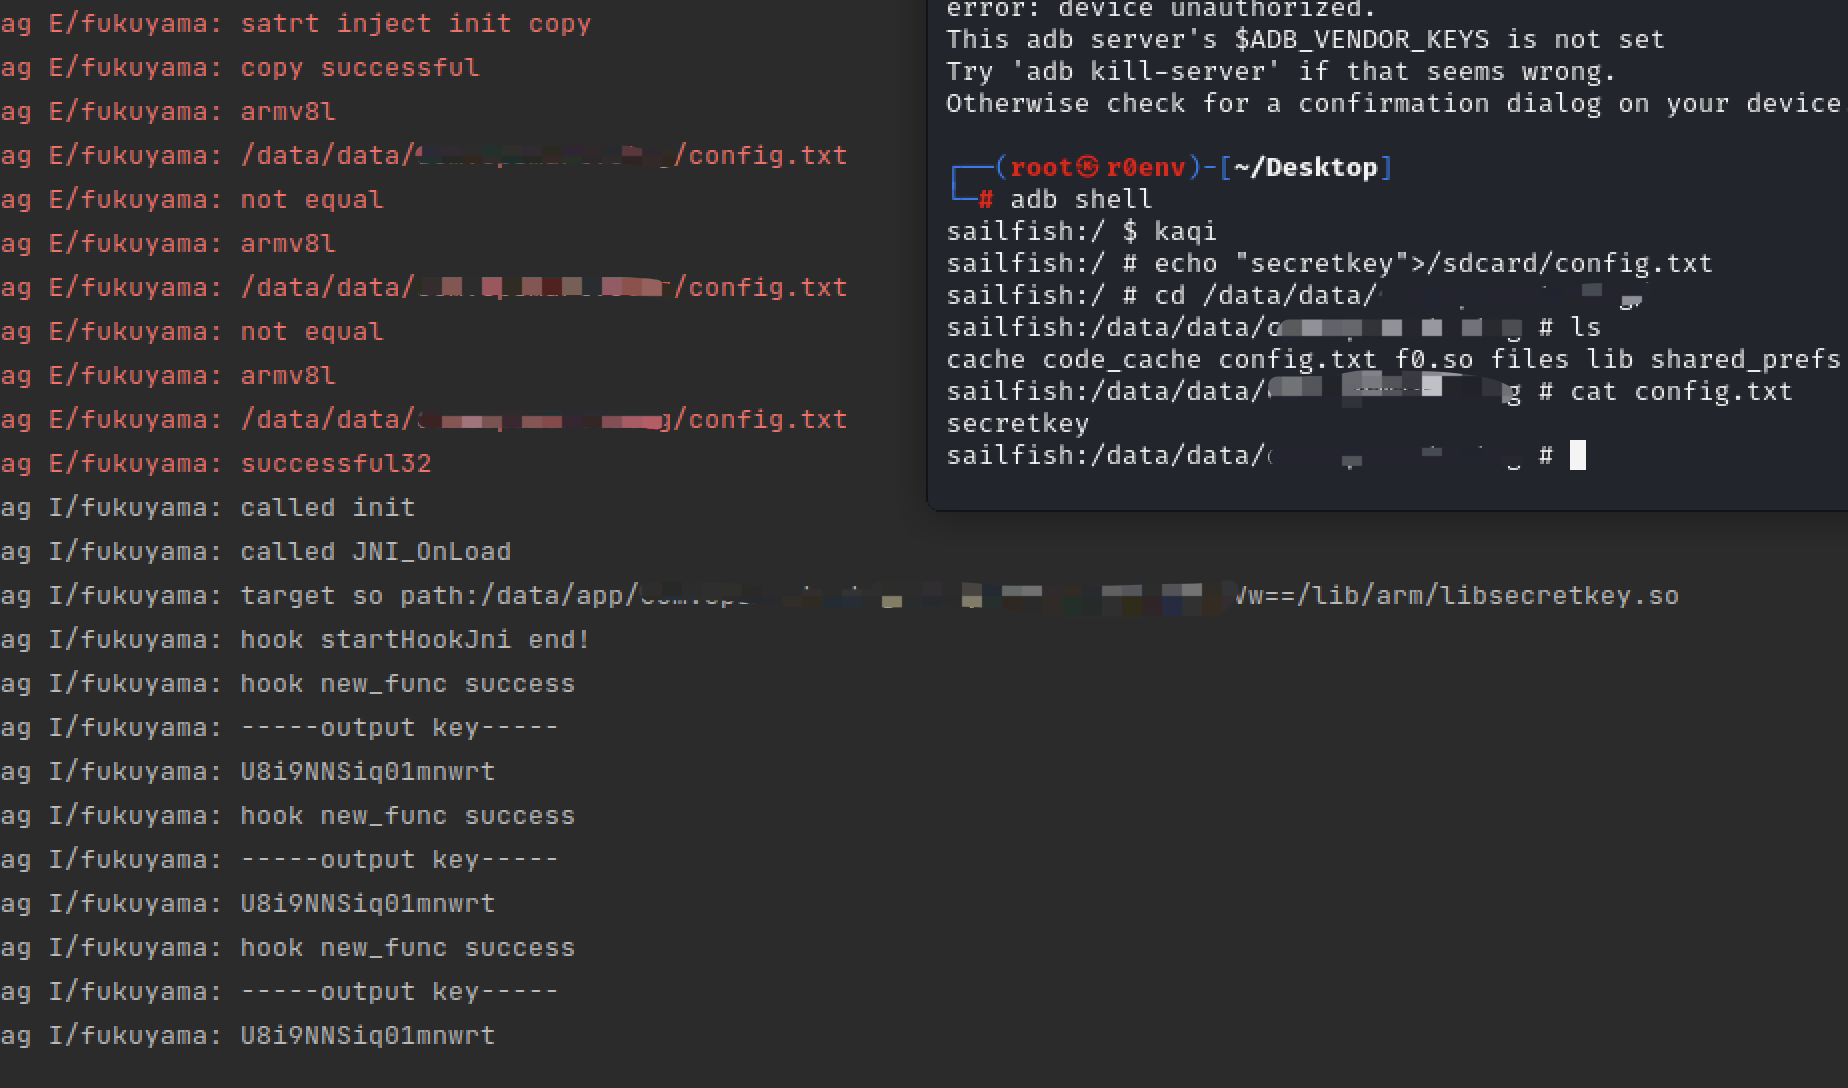
已经能hook到了。
总结
从注入so的出发,了解了sandhook框架的使用,学习参考了很多大佬的文章,收益匪浅。